
How to Void a Check in the Check Register
This article explains how to void a check using the View Check Register screen, covering both single-account and multi-account setups.
Navigation: Accounting > Cash & Bank > View Check Registers
For users with multiple banks and/or accounts
Inside the Bank Selection Screen:
1. Select a bank from the Banks list.
2. Select a bank account from the Accounts list.
3. Click the [Continue] button.
Within the View Check Registers Screen:
4. Filter/Sort the grid to locate the check.
5. Select the check by clicking on the corresponding line.
6. Click the [Void] button in the Action Ribbon.
7. Click the [Yes] button to the Check Register prompt: “Are you sure you want to void check #?”
8. Click the [Continue] button.
For users with only one bank and one account
Within the View Check Registers Screen:
1. Filter/Sort the grid to locate the check.
2. Select the check by clicking on the corresponding line.
3. Click the [Void] button in the Action Ribbon.
4. Click the [Yes] button to the Check Register prompt: “Are you sure you want to void check #?”
5. Click the [Continue] button.
Did You Know? When voiding an AP check, a notification showing the resulting invoice number is displayed under Accounting > Accounts Payable > Accounts Payable.
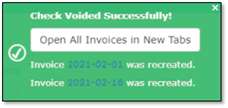
Click the link to open the recreated invoice in a new tab or click the Open All Invoices button to open up to 10 invoices in their own tab all at once.
The original AP invoice includes a notification block just below the Action Ribbon. It includes links to the voided check and the recreated invoice.
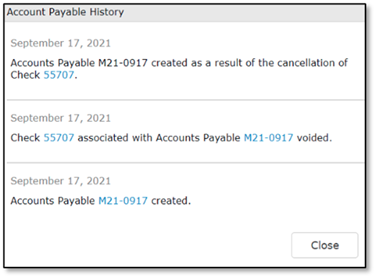
The View History button displays a log of all actions taken during the creation and processing of this AP invoice.
 Did this answer your question?